


23
Nov
How to Configure the Auto IP Updater using No-IP or Dyn DDNS
in Blogs
Comments
This article will provide instructions on how to keep your IP Address dynamically updated with DNSFlex using a third party DDNS hosting provider such as Dyn or No-IP. Please note – you can use any DDNS provider, we support standard host name resolution as a mechanism of updating your account IP.
There are a few methods in which this can be achieved, either by intalling DDNS software on your computer or configuring auto update on DDNS supported routers. Most modern day routers now support DDNS becuase of the convenience of not having to run an application on a computer 24/7. For this demonstration, we use the TP-Link Archer 7 AC1750 Router.
Step 1 – Register your hostname with Dyn DNS or No-IP
- For the purpose of this document, we choose to register a hostname with no-ip. Head on over to No-IP or Dyn to register your free hostname.
Step 2 – Configure DDNS on your Router
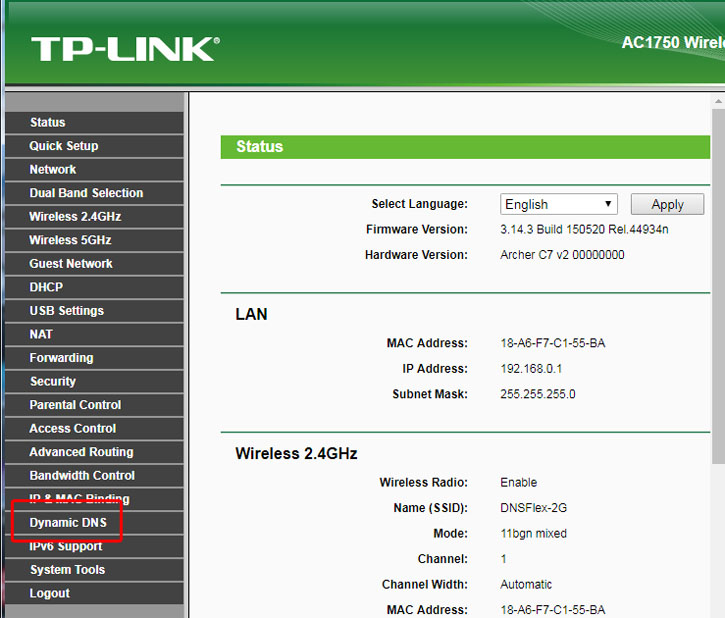
- Access your router’s default gateway IP to log into the administration manager. The address is typically http://192.168.0.1
- Select “Dynamic DNS” on the left menu bar
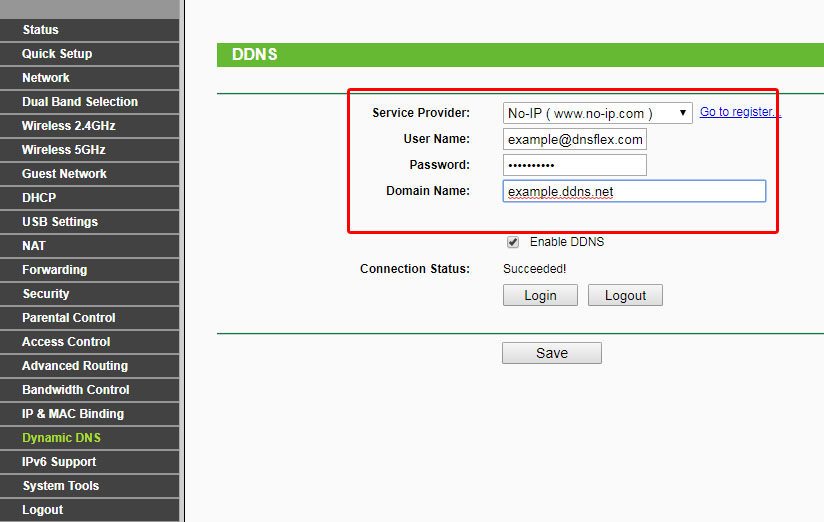
- Enter the No-IP service provider information
Step 3 – Configure Dynamic Hostname Updater in DNSFlex Dashboard
- Log into your DNSFlex Dashboard here
- Navigate to Settings -> Networks
- Enter your Dyn DNS or No-IP Hostname in the “Hostname” Box and click “Apply“
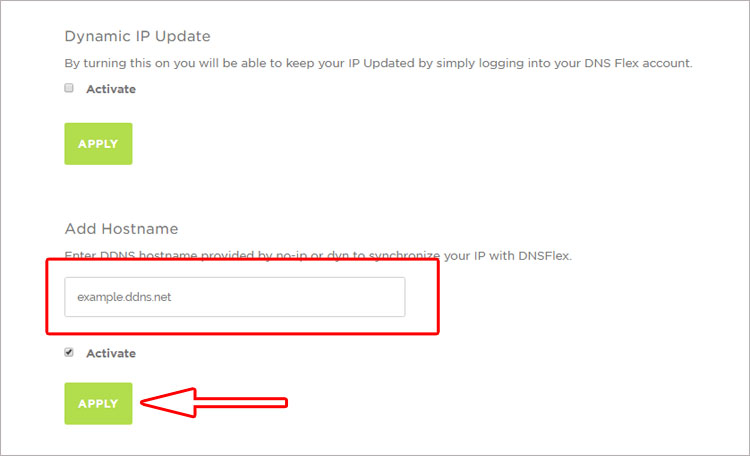
- You’re all done. Our System checks for IP updates every 5 minutes to ensure your Network IP address is synchronised with DNSFlex Smart DNS at all times.